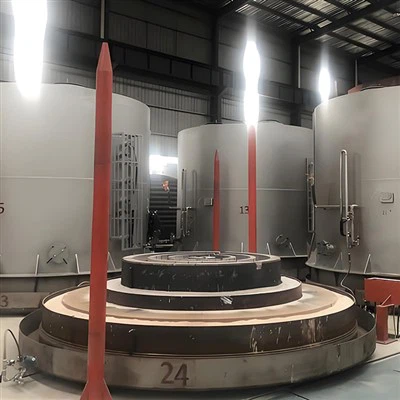
When it comes to the efficient operation of a Mold Roasting Furnace, the heating elements play a crucial role. As a trusted Mold Roasting Furnace supplier, I understand the significance of maintaining these heating elements in top - notch condition. In this blog, I will share detailed steps on how to replace the heating elements in a Mold Roasting Furnace.
Understanding the Importance of Heating Elements
Heating elements are the heart of a Mold Roasting Furnace. They are responsible for generating the high temperatures required to roast molds. The proper functioning of these elements ensures consistent and precise temperature control during the roasting process, which is essential for producing high - quality castings. Over time, however, heating elements can wear out due to factors such as high - temperature stress, over - current, and chemical corrosion. When this happens, it is necessary to replace them to maintain the furnace's performance.


Tools and Materials Needed
Before you start replacing the heating elements, gather the following tools and materials:
- Safety equipment: Safety goggles, heat - resistant gloves, and a respirator to protect yourself from high temperatures, dust, and fumes.
- Replacement heating elements: Make sure to choose the correct type and size of heating elements that are compatible with your Mold Roasting Furnace. As a Mold Roasting Furnace supplier, we can assist you in selecting the appropriate elements for your specific furnace model.
- Wrenches and pliers: These tools are used to loosen and tighten bolts and nuts during the replacement process.
- Screwdrivers: Both flat - head and Phillips - head screwdrivers may be required to remove covers and access the heating elements.
- Electrical tester: To ensure the power is off and to check the electrical connections before and after the replacement.
Step - by - Step Replacement Process
Step 1: Safety First
Before starting any work on the furnace, ensure that the power is completely turned off. Locate the main power switch or breaker and switch it off to prevent any electrical shock. It is also a good idea to lock out the power source to avoid accidental re - energization.
Step 2: Access the Heating Elements
Remove the furnace door or any panels that provide access to the heating elements. This may require using screwdrivers or wrenches to remove fasteners. Place the removed parts in a safe location so that you can reinstall them later.
Step 3: Disconnect the Electrical Connections
Once you have access to the heating elements, identify the electrical connections. Use a pair of pliers to carefully disconnect the wires from the terminals of the old heating elements. Make sure to label the wires or take a picture of the connections to ensure correct re - installation later. Before handling the wires, use an electrical tester to confirm that there is no electricity present.
Step 4: Remove the Old Heating Elements
Most heating elements are held in place by brackets or bolts. Use a wrench to loosen and remove the brackets or bolts that secure the old heating elements. Gently pull the old elements out of their sockets or mounting positions. Be careful not to damage the surrounding components or insulation.
Step 5: Clean the Installation Area
After removing the old heating elements, take the time to clean the installation area. Remove any debris, dust, or scale that has accumulated around the sockets or mounting points. A clean installation area will ensure a good fit and proper heat transfer for the new heating elements.
Step 6: Install the New Heating Elements
Carefully insert the new heating elements into the sockets or mounting positions. Make sure they are properly aligned and seated. Use the brackets or bolts to secure the new elements in place, but do not overtighten as this may damage the elements.
Step 7: Reconnect the Electrical Connections
Refer to your labels or picture to reconnect the electrical wires to the terminals of the new heating elements. Make sure the connections are tight to prevent loose contacts, which can cause overheating and electrical problems. Once the connections are made, use an electrical tester to check the continuity.
Step 8: Reassemble the Furnace
Replace the furnace door or panels that you removed earlier. Secure them with the appropriate fasteners. Double - check that all parts are properly installed and there are no loose components inside the furnace.
Step 9: Power On and Test
After reassembling the furnace, switch on the power. Monitor the furnace closely as it starts up. Check the temperature display to ensure that the new heating elements are functioning properly. Look for any signs of abnormal operation, such as overheating, sparks, or strange noises. If you encounter any problems, immediately turn off the power and troubleshoot the issue.
Different Types of Mold Roasting Furnaces and Their Heating Element Features
We offer a variety of Mold Roasting Furnaces, each with its own unique features and heating element requirements:
- Through - type Shell Baking Furnace: This type of furnace is designed for continuous roasting operations. The heating elements in a Through - type Shell Baking Furnace are usually arranged in a way that provides uniform heat distribution along the length of the furnace. They are often made of materials that can withstand high - temperature and continuous - use conditions.
- Trolley Type Roasting Furnace: Trolley Type Roasting Furnaces are suitable for batch - type roasting. The heating elements in these furnaces are typically installed on the sidewalls or the top of the furnace chamber. They need to be able to heat up the molds quickly and maintain a stable temperature during the roasting process.
- Box Type Shell Baking Furnace: Box Type Shell Baking Furnaces are compact and ideal for small - scale production. The heating elements in a box - type furnace are usually evenly distributed inside the chamber to ensure uniform heating. They are often designed to be easily replaceable to minimize downtime.
Maintenance Tips After Replacement
- Regular Inspections: Periodically inspect the heating elements for signs of wear, damage, or corrosion. Check the electrical connections for tightness and signs of overheating.
- Cleaning: Keep the furnace and the heating elements clean. Remove any debris or scale that may accumulate on the elements, as this can affect their performance.
- Temperature Monitoring: Continuously monitor the furnace temperature to ensure that the heating elements are functioning correctly. Any significant fluctuations in temperature may indicate a problem with the elements.
Conclusion
Replacing the heating elements in a Mold Roasting Furnace is a task that requires careful attention to detail and safety precautions. By following the steps outlined in this blog, you can ensure a successful replacement process and keep your furnace operating at its best. As a reliable Mold Roasting Furnace supplier, we are committed to providing high - quality products and comprehensive support. If you have any questions about heating element replacement or need to purchase new elements or a Mold Roasting Furnace, please don't hesitate to contact us for procurement and further discussions.
References
- "Industrial Furnace Handbook: Principles, Construction, and Operation" by Helmut Knözinger
- "Heat Treatment Furnaces: Design and Operation" by various industry experts